Last Updated on April 15, 2024 by Nadeem Ahmad
How to Draw the Golden Gate Bridge. Bridges get you from one place to another in their most basic form. A bridge can be small over a small stream or huge over an ocean. The Golden Gate Bridge illustrates one of the greatest variants and is certainly one of the world’s most famous and iconic bridges. Found in San Francisco, this bridge is well-known worldwide for its massive size and unique design.
Fans of this bridge often like to learn how to draw the Golden Gate Bridge to commemorate it in their works. If you are a fan of this famous bridge, this will be a tutorial not to be missed! If you are looking for 3d drawing, drawing for kids, cartoons drawing, animals drawing and many more, then you are at the right place.
Drawing the Golden Gate Bridget
Step 1:
One of the defining features of this landmark is the system of wires and cables that run over it and connect to the bridge itself. We will start this guide on how to draw the Golden Gate Bridge by starting with these lines for the cables. The cables we draw first will be the ones going through the bridge to which the verticals will connect.
These will need to be drawn specifically to look accurate, so do your best to position and draw them exactly as they appear in our reference image. We’ll use curved lines to give them the famous loop shape they have in real life.
Step 2:
Now that you have drawn the cables for the bridge, you can start drawing the bridge itself. It will be drawn with slightly curved horizontal lines that will be all close to each other. These lines will also converge to a single point on the right side of the bridge.
As you draw, use the reference image to see where you need to leave some small gaps on the bridge, as these will be where the bridge piers will go later. We’ll start drawing these pillars in the next step of the guide, so when you’re ready, let’s continue!
Step 3:
We mentioned the bridge pillars in the last step of our direction on drawing the Golden Gate Bridge, and in this one, we will draw them. The pillars are composed of several horizontal sections with empty spaces between them.
Each section will be smaller than the previous one as you go. Then the piers at the bridge’s other end will be drawn with much less detail. Add some small details to the bridge; then, we can move on to step 4!
Step 4:
We will now draw the cables for this drawing of the Golden Gate Bridge. First, use curved lines for some rocks on the left side of the bridge. Next, use a ruler to draw thin vertical lines inside the first section of the bridge.
Step 5:
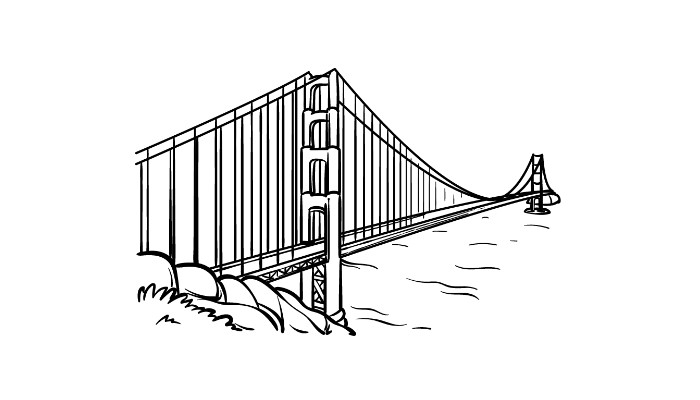
To complete this picture before the final step, we will add details and finishing touches in this stage of our direction on drawing the Golden Gate Bridge. To do this, we’ll add more straight vertical lines along the last section of the bridge. Draw these lines to end the threads as you started in the previous step.
Then we will draw wavy lines on the ocean to make it look like small waves are on the surface. Once these details are drawn, you can add more details and ideas!
These can include weather details like clouds or rain or maybe something like an airship in the background. These are just a few examples of what you could do to complete it, but how can you think of adding your details and touches?
Step 6:
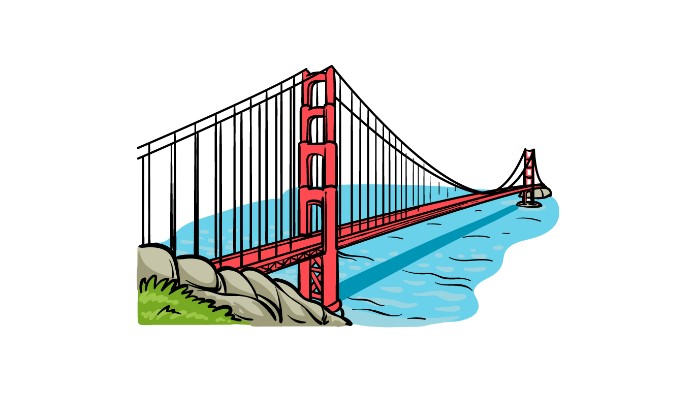
This famous bridge is well known for its bright red color, which we’ve chosen in our example image. If you want the colors of your drawing of the Golden Gate Bridge to be true to life, you can use our reference image to guide you while coloring! When adding color to an image, choosing colors is only part of the process.
Deciding which art mediums to use is a whole new challenge, and for this one, we recommend mediums that allow for greater precision. Examples of this would be colored pens, pencils, or fine-tipped paintbrushes. These mediums would be great for getting the finer details, but what will you use for this image?
Create Your Golden Gate Bridge Drawing Unique
Make this iconic bridge even more beautiful with these tips! This drawing of the Golden Gate Bridge we created features an enlarged view of this iconic structure. I could scale things up a bit if I wanted to show some smaller details of the Golden Gate Bridge. If you were to do that, you might want to search for images of the real Golden Gate Bridge to help you depict some of those finer details. It would allow you to enjoy different views of the bridge! By adding to our previous section, you could make this drawing of the Golden Gate Bridge more vibrant with some signs of life.
It would perform quite well if you soared in, as we told you! The first place to start would be to add some cars. These wouldn’t need to be very detailed because even with a magnified view, we probably wouldn’t be able to make out a lot of detail. You might even have a few people crossing the bridge! The sky above the Golden Gate Bridge is obscured in this image. It leaves room for you to add some of your sky effects! The type of sky you add is up to you! It could be a nice clear blue day, or clouds could be overhead. The sky you add will also dramatically change the mood of the artwork.
What time would you like to represent? The Golden Gate Bridge is one of many iconic artificial landmarks in the United States. You could make an interesting collage picture if you had more of these structures in the picture! They don’t have to come from San Francisco like the Golden Gate Bridge. For some ideas, you can include the Statue of Liberty, the Empire State Building, or maybe Mount Rushmore. These are just a few suggestions, but you can draw any of your famous buildings and structures!
Your drawing of the Golden Gate Bridge is complete!
It is one of the numerous bridges on the earth, and we hope you had fun recreating it in this guide on how to draw the Golden Gate Bridge. When recreating a true landmark, accurately representing all features and details can be difficult. We hope this principle has created it comfortable and fun for you. You can continue having fun with your additions now that you’ve drawn.
Are you going to draw a background, add weather effects, or maybe play around with colors and artistic mediums to add your touch? If you had a lot of fun working on this guide, you can find your next awesome drawing guide on our website! We have a great and growing selection of guides for you, so check back regularly.
Also Read: HOW TO DRAW A SAD ANIME